


This post may contain affiliate links. Where I make a small commission on purchased items, at no extra cost to you. See my disclosure for details.
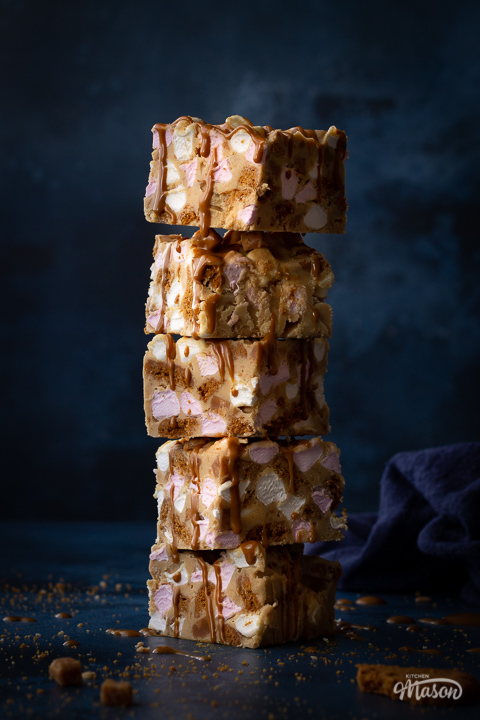
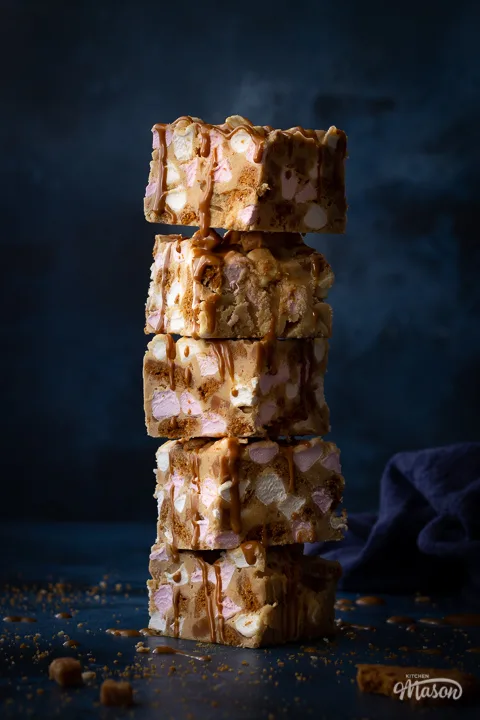
This super quick No Bake Biscoff Rocky Road will satisfy ALL your cravings and more without barely lifting a finger! Packed full of crunchy Biscoff biscuit pieces, chewy marshmallow and soft fudge, these enticing bars of deliciousness will blow your marvellous mind!
Just like my Biscoff fudge and Biscoff cake, there’s Biscoff spread right there in the mixture too. So if you want to know how to make this amazing treat, keep scrolling for the easy step by step picture recipe, helpful tips and more!
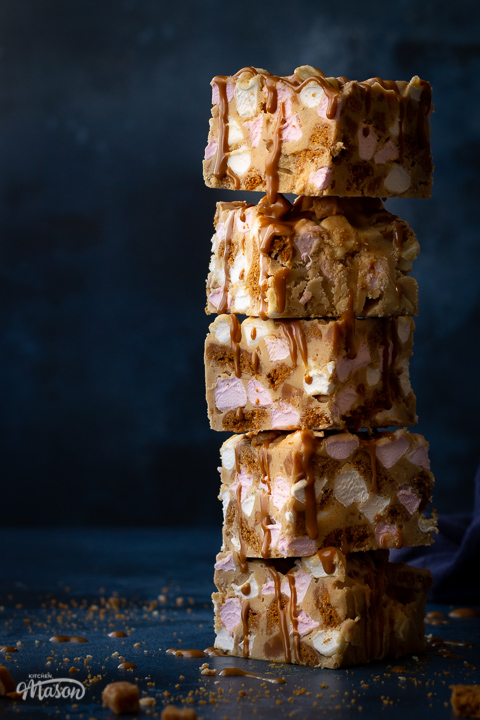

Phwoar, just look at that. Beautiful isn’t it?! It reminds me of my Biscoff cheesecake recipe and Biscoff brownies recipe in that, I basically want to inhale it whole! You must think I’m obsessed with Biscoff – well, I am a little bit I guess haha!
Can't face cooking dinner on Fridays? 😩
Imagine a guilt free Friday night dinner, without the exhausting mental load. BYOD Fridays are a fun and supportive Friday night community for tired people who still need to cook, but really cba 💛
Join The Community
In all seriousness, this wonderful Biscoff rocky road is SO quick to make. It’s perfect for the kids/grandchildren to get involved with too as there’s no oven required. Did I mention that it tastes absolutely incredible too?!
In actual fact, it would also double really well as a homemade gift. Simply pop in a clear cellophane bag, tie with a ribbon and give to your friends and family. They’ll love it!


What you need to know
Here’s where ALL the useful information is!! I’ve made this a few times (and made a few mistakes along the way) so I’m sharing my knowledge on Biscoff rocky road to ensure you can get it perfect first time!

Ingredients
Ingredients are way more important than you think. Here’s everything you should know about the ones needed to make this recipe.
- White Chocolate – In all honesty, any kind will do here. It doesn’t need to be expensive Belgian white chocolate as the Biscoff will flavour it heavily anyway.
- Biscoff Spread – Smooth spread only! We’re adding Biscoff biscuits into the mix anyway so no need for them in the ‘liquid’ part of the mixture too.
- Butter – I always recommend using unsalted in baking (or no baking) to give you full control over the salt and flavour content.
- Mini Marshmallows – You know the ones, those tiny pink and white fluffy little things? They’re perfect for rocky road!
- Lotus Biscoff Biscuits – I wouldn’t substitute these for other biscuits as it would lessen the overall Biscoff flavour. You can get them at virtually every supermarket nowadays anyway.
- Fudge Pieces – I get mine from Asda. They’re teeny little cubes of vanilla fudge that are about half a cm cubed. You could also buy larger ones and chop them smaller as an alternative.

How to make Biscoff rocky road – recipe summary
- Melt white chocolate, Biscoff spread and butter together in a large bowl.
- Stir through marshmallows, chopped Biscoff biscuits and fudge pieces.
- Press into a lined tin and chill for 1 hour.
- Remove from the tin, slice and enjoy!
If you’re looking for another simple recipe to make with the kids, this Biscoff traybake could be just the ticket!

Recipe tips
Here are some tips I think you will find helpful when making Biscoff rocky road!
- This doesn’t have to be expensive. You can absolutely use the cheap 100g bars of supermarket own brand white chocolate and it will still taste amazing!
- Don’t chop the Biscoff biscuits too finely. You want some nice bits of crunchy texture.
- Make sure you mix this really well to ensure a good, even distribution of flavours and textures. And also to ensure it’s all evenly coated and sticks together nicely.
- When pressing the rocky road mixture into the tin, make sure to press very firmly. This ensures it won’t fall apart or be crumbly once set.
How to store Biscoff rocky road
It’s best to store your Biscoff rocky road in an airtight container at room temperature and consume within 2 weeks. If it’s particularly warm (Summer) you can store it in the fridge instead.

Biscoff Rocky Road – Step by Step Picture Recipe
(For a printer friendly version, see the recipe card at the end of this post)
Please note, this recipe includes both UK metric and US Cup measurements.
Ingredients
Here is what you will need to make 16 bars.
- 400g (14 oz) White Chocolate
- 125g (2/3 cup) Smooth Biscoff Spread + 2 tbsp for decoration
- 50g (1/4 cup) Unsalted Butter
- 130g (4.5 oz) Mini Marshmallows
- 200g (7 oz) Lotus Biscoff Biscuits, Chopped
- 75g (1/2 cup) Fudge Pieces
Essential equipment
- 20cm (8″) Square Baking Tin
- Large Mixing Bowl
- Spatula
- 1 x Disposable Piping Bag/Plastic Food Bag
Instructions
First, lightly grease and line the base and sides of your tin. Set to one side until needed.
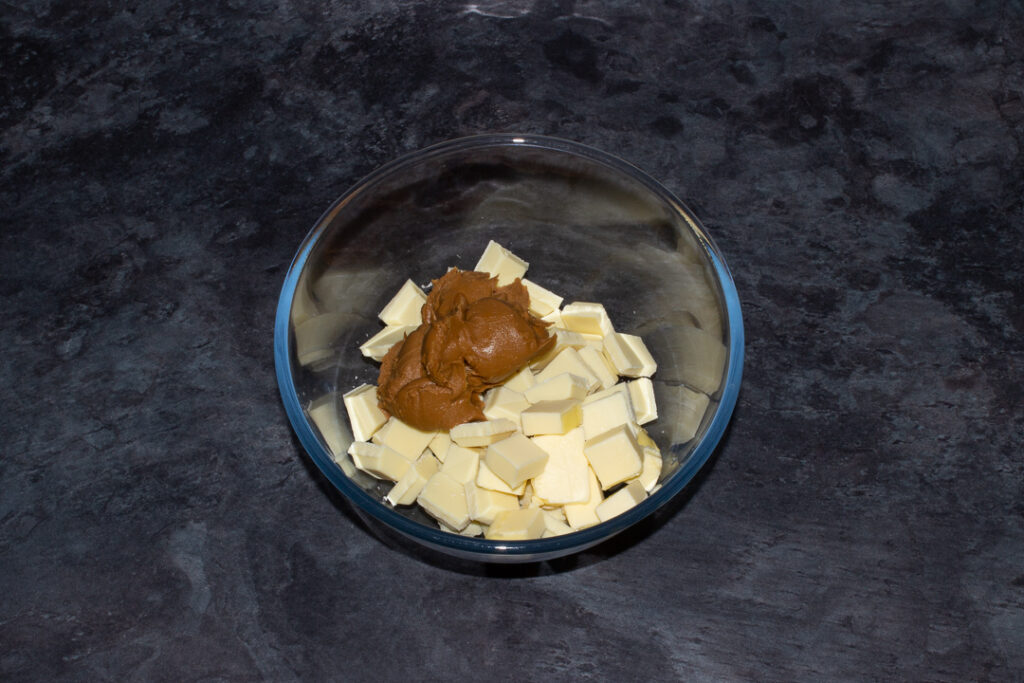
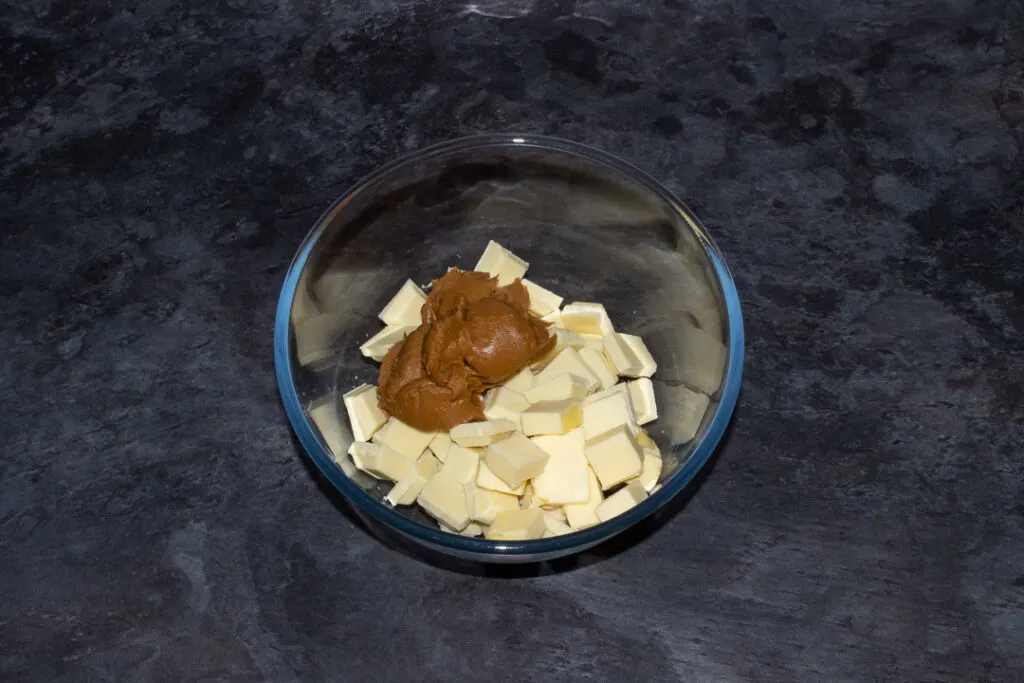
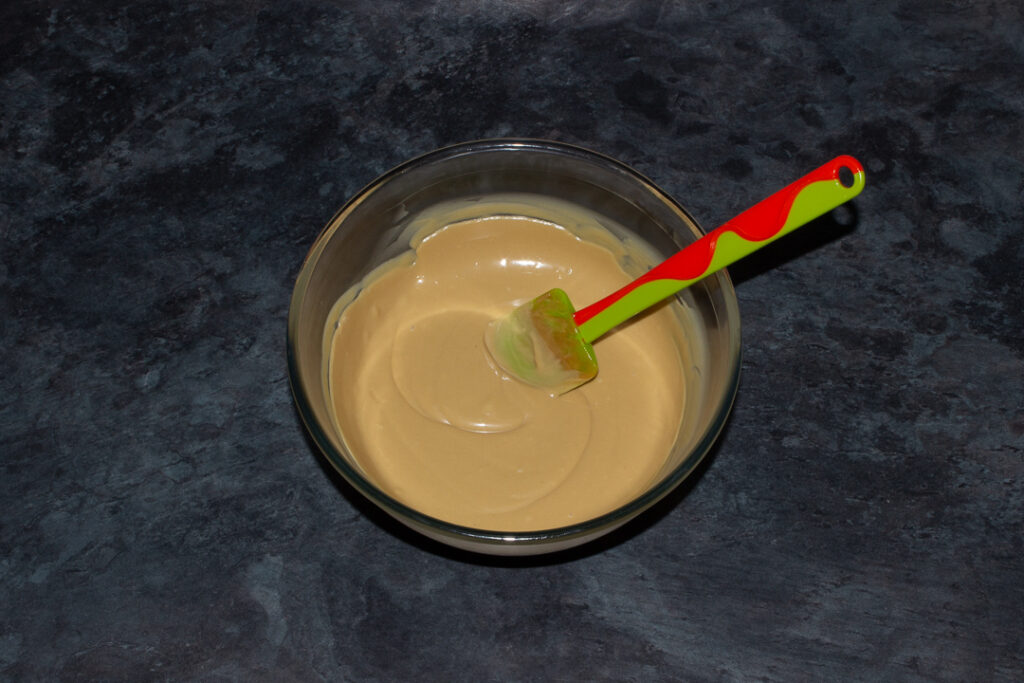
Break the white chocolate (400g | 14 oz) into a large microwavable bowl and add the Biscoff spread (125g | 2/3 cup) and butter (50g | 1/4 cup). Then heat in 10 second intervals in the microwave, stirring well between each time, until it’s melted and smooth.

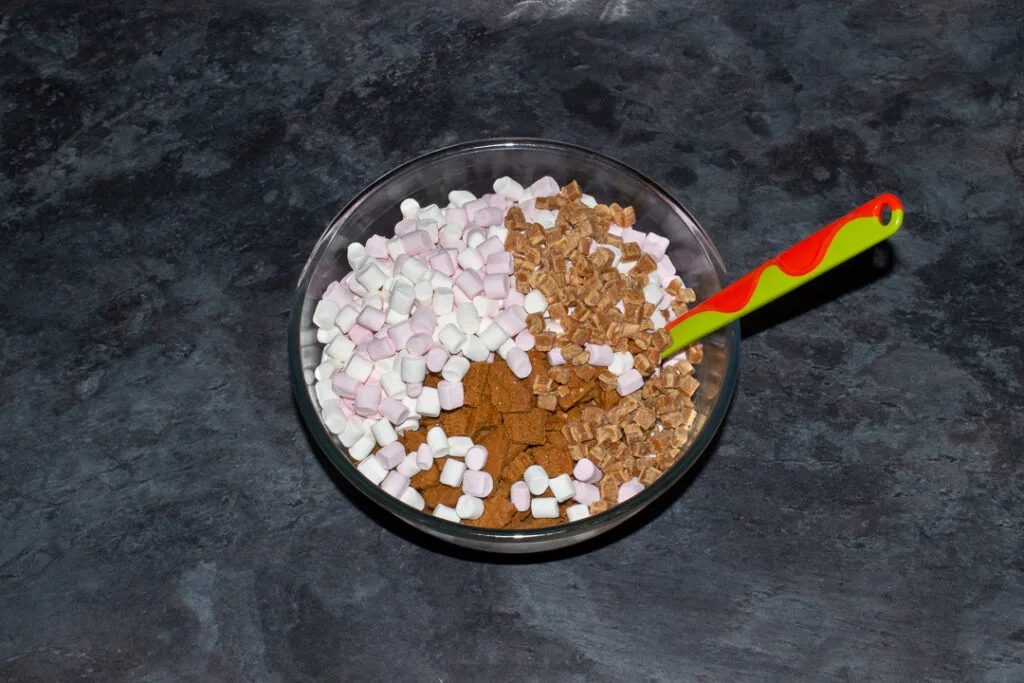
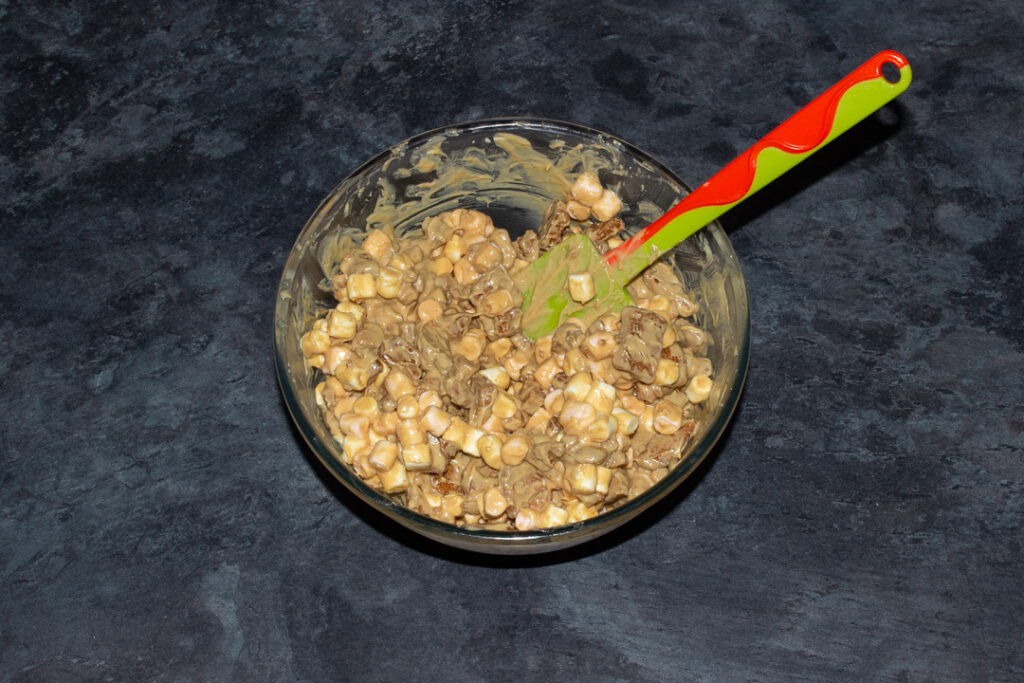
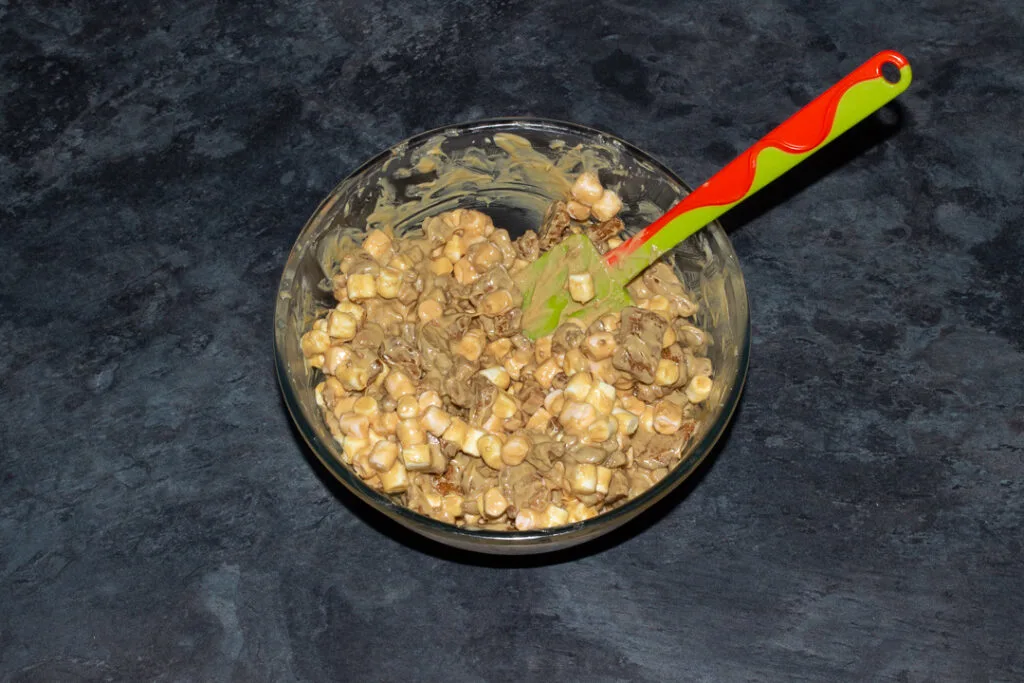
Next, tip in the marshmallows (130g | 4.5 oz), the chopped Biscoff biscuits (200g | 7 oz) and the fudge pieces (75g | 1/2 cup).

Now give it a really good mix…
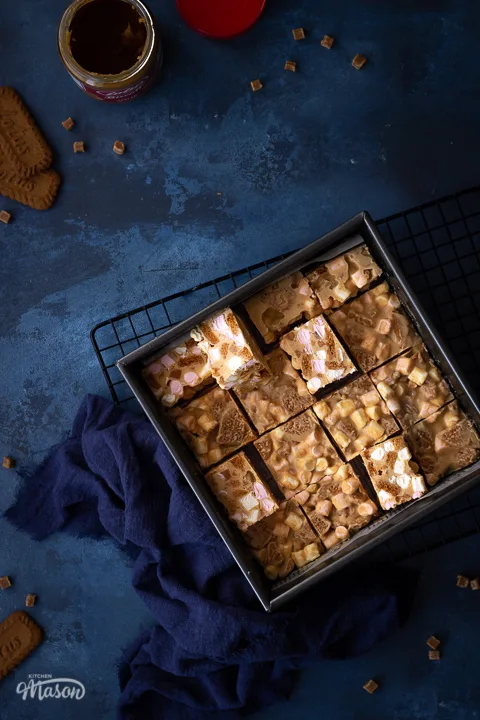
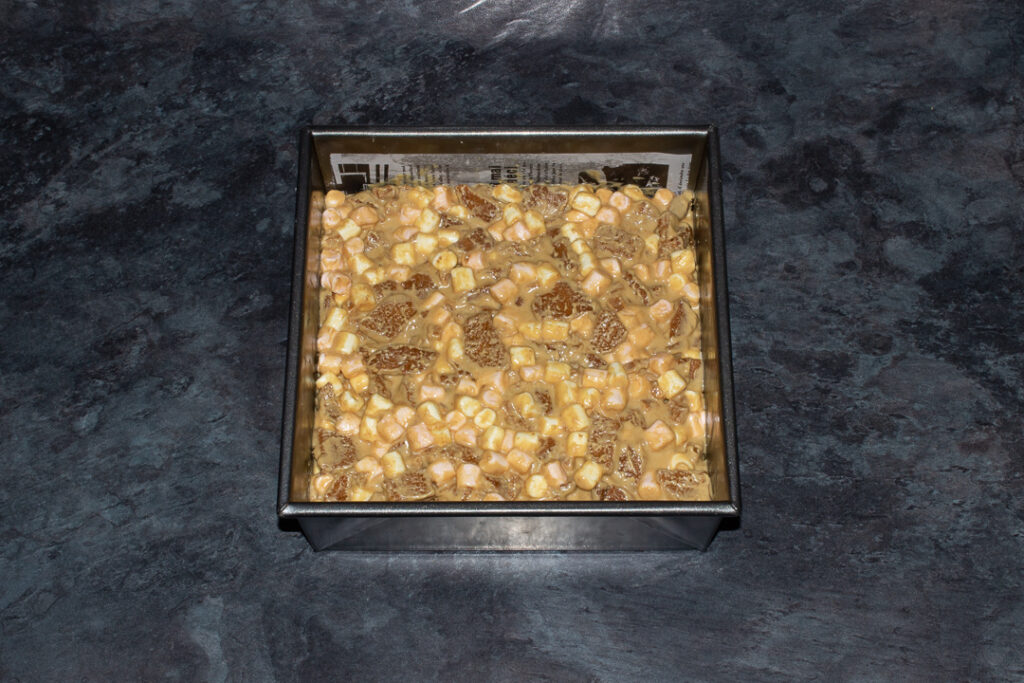
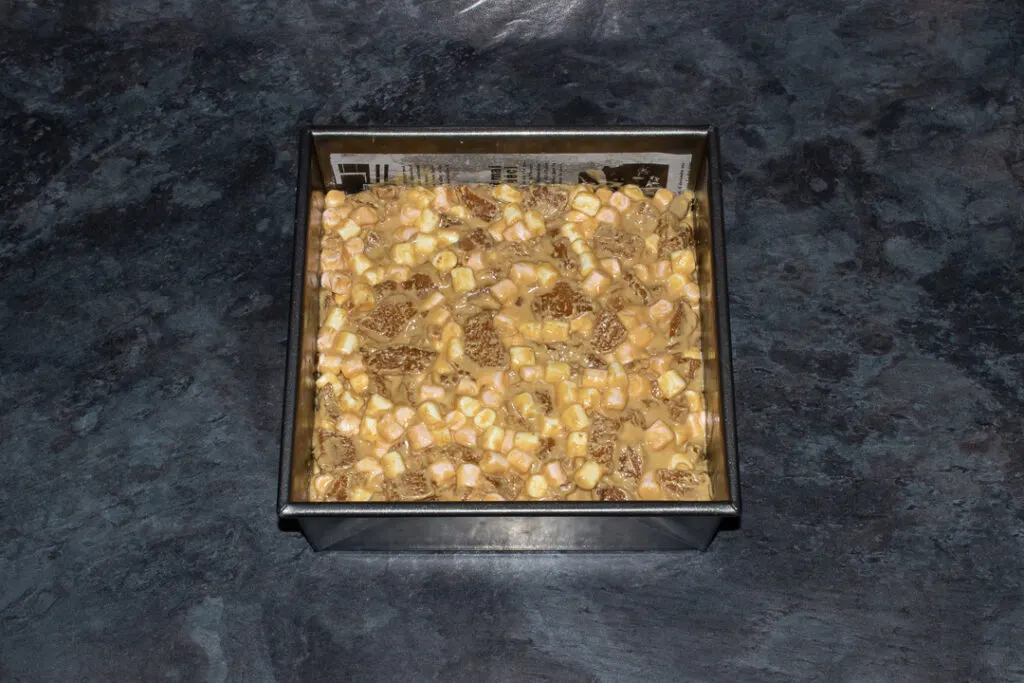
Then tip the mixture into your prepared tin and press in firmly all over until it’s relatively even on top. Pop it into the fridge for at least 1 hour to completely set.
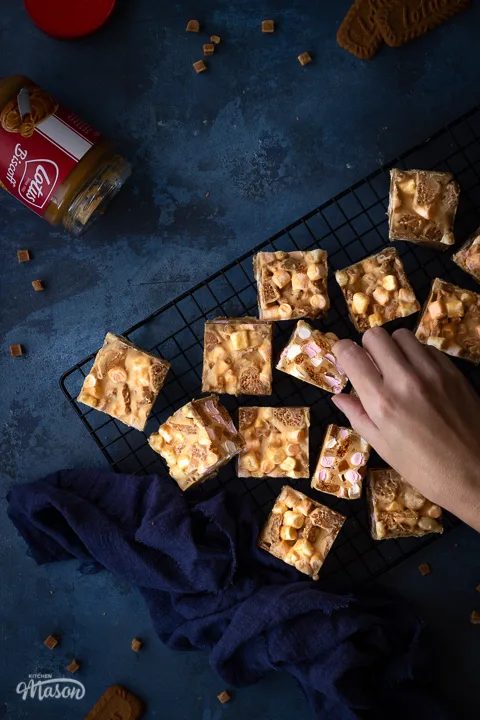
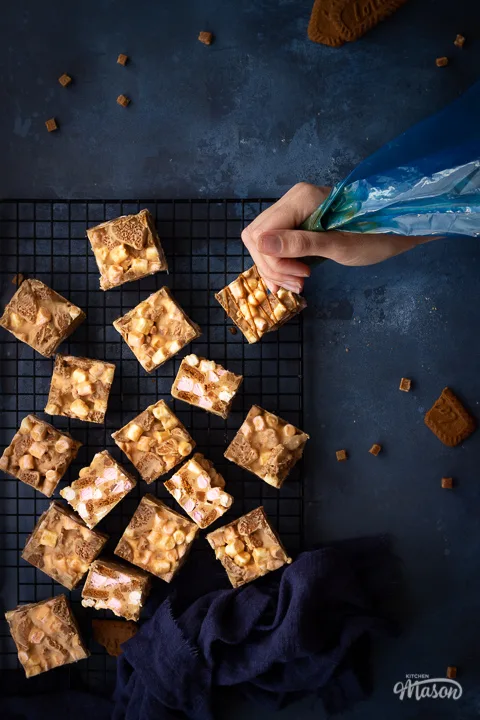
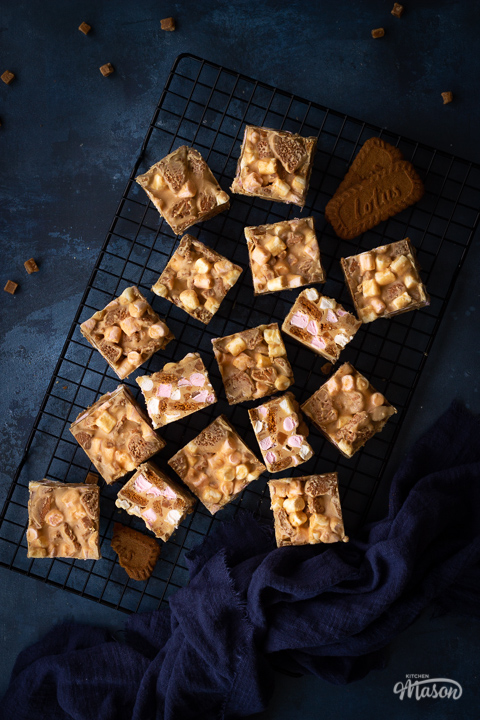
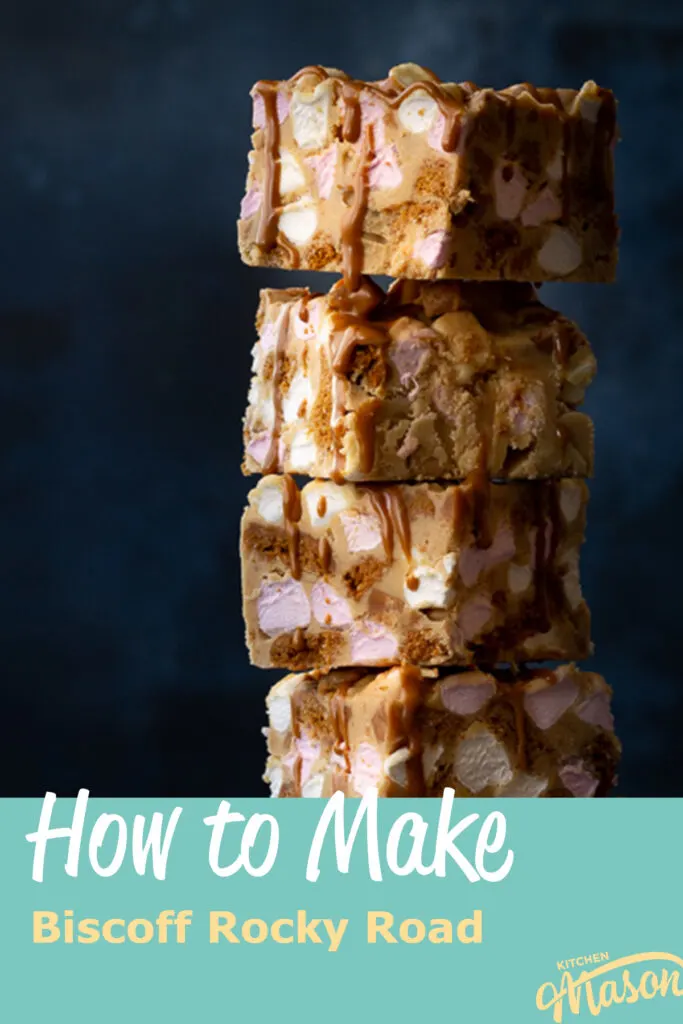
Once your Biscoff rocky road is set, remove it from the tin and slice into 16 bars with a sharp knife.
Decoration instructions
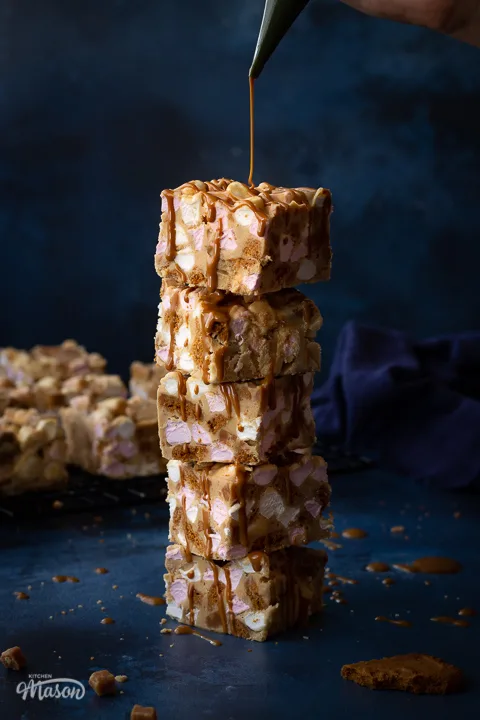
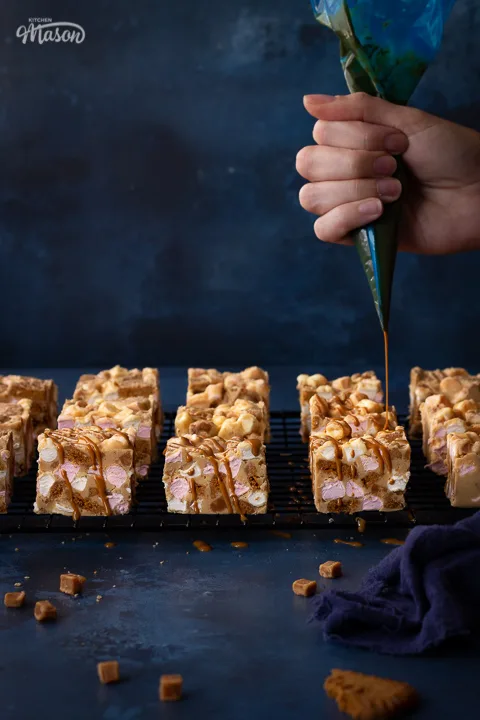
Place them on a wire rack set over a sheet of newspaper ready for the final touch.
Put the extra 2 tbsp of Biscoff Spread into a disposable piping bag or a plastic food bag then heat in the microwave for 15-20 seconds until warm and runny.
Snip the end/corner and zig zag the melted Biscoff over each bar. Allow to set at room temperature.
Store in an airtight container at room temperature and consume within 2 weeks.

Have you made this recipe?
Have you made this brilliantly moreish Biscoff rocky road? I’d love to know if you have! Send me your pics, comments and questions on Facebook, Twitter and Instagram or email me at emma@kitchenmason.com.
Loved this recipe? Pin it!


Easy Biscoff Rocky Road Recipe
This is the easiest, quickest and tastiest recipe EVER for Biscoff rocky road! Perfect for Birthday parties, homemade gifts or just to share with your loved ones.
Ingredients
- 400g (14 oz) White Chocolate
- 125g (2/3 cup) Smooth Biscoff Spread + 2 tbsp for decoration
- 50g (1/4 cup) Unsalted Butter
- 130g (4.5 oz) Mini Marshmallows
- 200g (7 oz) Lotus Biscoff Biscuits, chopped
- 75g (1/2 cup) Fudge Pieces
Essential Equipment
- 20cm (8") Square Baking Tin
- Large Mixing Bowl
- Spatula
- 1 x Disposable Piping Bag/Plastic Food Bag
Instructions
- Grease and line the base and sides of the tin. Melt together the white chocolate, Biscoff spread and butter in a bowl in the microwave in 10 second intervals. Stir well between each time.


- Add in the marshmallows, biscuits and fudge pieces. Stir well to evenly distribute.

- Press the mixture into the tin and set in the fridge for 1 hour.

- Remove and slice into 16 bars then place on a cooling rack set over a sheet of newspaper. Heat the 2 tbsp of extra Biscoff spread in a piping bag/food bag in the microwave for 20 secs until runny. Snip the end and pipe zig-zags over each bar, and allow to set completely.


Notes
If you would rather use a more in depth picture recipe, please see the main body of this post. Where you’ll also find lots of extra FAQs and helpful tips, should you need them.
Please note, this recipe includes both UK metric and US Cup measurements.
Storage
Store in an airtight container at room temperature. Consume within 2 weeks
Tips
- This doesn’t have to be expensive. You can absolutely use the cheap 100g bars of supermarket own brand white chocolate and it will still taste amazing!
- Don’t chop the Biscoff biscuits too finely. You want some nice bits of crunchy texture.
- Make sure you mix this really well to ensure a good, even distribution of flavours and textures. And also to ensure it’s all evenly coated and sticks together nicely.
- When pressing the rocky road mixture into the tin, make sure to press very firmly. This ensures it won’t fall apart or be crumbly once set.
Recommended Products
As an Amazon Associate and member of other affiliate programs, I earn from qualifying purchases at no extra cost to you.


Nutrition Information:
Yield: 16 Serving Size: 1Amount Per Serving: Calories: 309Total Fat: 17gSaturated Fat: 8gTrans Fat: 0gUnsaturated Fat: 8gCholesterol: 17mgSodium: 91mgCarbohydrates: 37gFiber: 0gSugar: 28gProtein: 3g
Nutritional information on kitchenmason.com should only be used as a general guideline, I am not a certified nutritionist. Please always check labels for allergens where applicable.

Emma is a British recipe writer, home cook, and founder of Kitchen Mason. For over 15 years, she has been creating simple, comforting recipes and practical kitchen tips that help tired, everyday people make dinner feel easier and more enjoyable again. Passionate about British home cooking, Emma shares reliable recipes, comforting classics, and realistic kitchen guidance designed for real life. Her work has also been featured in publications including Food Network, Cosmopolitan, and The Huffington Post.
Knowledgeable On: British home cooking, Easy dinner ideas, Comford food recipes, Recipe writing
Jeanette
Thursday 19th of September 2024
Hi Emma,
Can I actually put the small piping bag with the biscoff spread into the microwave? Thank you
Emma
Friday 20th of September 2024
Hi Jeanette. Yes. I've done this before with the blue plastic piping bags, and it worked fine. You just have to 'shmush' it around a bit in the bag to make sure it's evenly warmed through. (Technical term there haha!) Emma x
Kara
Friday 30th of July 2021
What are fudge pieces? Please?
Emma
Saturday 31st of July 2021
Hi Kara. So here in the UK we can get small bags of vanilla fudge chopped into really small pieces. Hope this helps! Emma x
Claire
Thursday 12th of November 2020
Hi Emma, thans for the recipe. I am going to make these and was sondering in i van freeze them. Thanks, greetings from the netherlands, Claire
Emma
Thursday 12th of November 2020
Hi Claire, you’re welcome! I’ve never actually frozen them before so not sure if it would work or not. Sorry I can’t be of more help! Emma x
sharon
Friday 6th of November 2020
I have made these several time, absolutely delicious and very sweet which is what I like. you have lots of great recipes
Emma
Friday 6th of November 2020
Aww thank you so much Sharon! I'm super happy you're enjoying my recipes :) Emma x
Bianca
Thursday 6th of August 2020
Hi Emma,
I’m going to serve this as a dessert at a dinner party with ice cream, which flavour would you recommend? Vanilla maybe?
Thanks x
Emma
Friday 7th of August 2020
Hi Bianca. If I'm honest, I'm not sure this is the sort of thing I'd serve with ice cream as a dessert. It's not soft in any way, it sets very firm. Emma x